
My tap water pH is 8.7. I found that out after six months of watching basil turn yellow, trying different nutrients, adjusting light schedules, and blaming everything except the water. The whole time, the problem was sitting right there in the tap, invisible. If you’re looking for first time hydroponic garden tips pod system beginners actually need, start here: test your water before you do anything else.
That’s the mistake I want you to skip. So before I get into the seven tips, there’s a Step 0 that belongs before you fill the reservoir for the first time. And honestly, if I’d found a guide that led with this, I would have saved myself an entire failed grow and about three months of confusion.
Step 0: Test your tap water before you do anything else. Your city’s water quality report is free online. Search “[your city] water quality report” and look for two numbers: TDS and pH. TDS above 500 means your tap water already has enough dissolved solids to interfere with nutrient uptake. pH above 7.5 means you’ll be fighting alkalinity from day one. Either of those warrants starting with filtered water. Some growers hit both problems at once, and their first grow fails completely before they figure out why.
Quick Answer: The biggest first-grow mistakes in pod systems like AeroGarden, iDOO, and LetPot have almost nothing to do with the garden itself. Test your tap water before you start, use half the recommended nutrient dose for seedlings, cover empty pod holes to block algae, and don’t mix fruiting plants with herbs in the same reservoir. Get those four things right and your first grow has a real shot.
Tip 1: Start with Two or Three Pods, Not All Twelve
The iDOO 12-pod buy on Amazon has twelve pod slots. Filling all twelve immediately is the most natural thing in the world. It’s also a good way to end up with an overcrowded canopy where fast-growing plants shade out slower ones, a depleted reservoir that plants drain faster than you expect, and a maintenance headache before you’ve even figured out the basics.
Start with three to six pods max. Pick one plant type for the whole tray. Basil and lettuce are the most forgiving first crops because they germinate fast, tolerate minor pH and nutrient swings, and give you quick visual feedback. Lettuce is the better beginner crop of the two because it grows consistently and you can harvest it with a cut-and-come-again method that extends the grow to two or three months. Most beginners pull the whole plant at week four and miss half the harvest.
Cover the empty pod holes. Not with anything fancy, foil, a golf ball, the stickers that came with the system. The point is to block light from reaching the reservoir surface. Open holes are the main reason pod gardens develop algae blooms in the first two weeks, and once algae is established, it’s a real pain to clear. Blocking it from day one takes ten seconds and saves hours later.
Tip 2: Use Half the Nutrient Dose for Seedlings
The dosing instructions on hydroponic nutrient bottles are written for mature plants in large reservoirs, not seedlings in a 4.5-liter pod tank. Half the recommended dose is the right starting point for anything in its first two weeks.
Here’s why it matters: in a small reservoir, nutrient concentration climbs fast. Plants drink water faster than they drink nutrients, so every plain-water top-off you add actually concentrates the nutrients that are left behind. In a 4.5-liter tank, that spiral happens in days, not weeks. Full-strength nutrients on young seedlings in that environment causes tip burn, brown edges, and stunted roots. It looks like a deficiency. It isn’t. It’s the opposite.
Once you see roots visible through the pod holes (usually day seven to ten), you can bump up toward full strength. Before that, half dose. If your system came with a nutrient starter (iDOO’s A+B bottles, AeroGarden’s liquid food), those are already pre-measured for convenience, but still start at half during germination.
The same instinct that makes you want to fill all twelve pods also makes you want to give plants as much food as possible. Resist both. And if you’re unsure whether your seedlings are ready for full strength, the answer is almost always to wait another few days, roots tell you more than the calendar does.
Tip 3: Know Your EC Target Before You Add Anything
EC is short for electrical conductivity and it tells you how nutrient-rich your water is. A cheap TDS or EC pen (roughly $10-15) is the single most useful tool you can add to a pod garden. Not a luxury. The iDOO manual says to change the water every ten to fourteen days, but the actual signal to change the water is when EC drops below your target range, not when the calendar says so.
Here’s a table worth bookmarking:
| Plant Type | Target EC Range |
|---|---|
| Herbs (basil, cilantro, mint) | 1.0, 1.6 mS/cm |
| Lettuce and greens | 0.8, 1.2 mS/cm |
| Fruiting plants (tomatoes, peppers, strawberries) | 2.0, 3.5 mS/cm |
The gap between lettuce and fruiting plants is not a rounding error. It’s a real, significant difference. Which brings up the next tip.
Tip 4: Don’t Mix Fruiting Plants and Herbs in the Same Reservoir
This is the mistake nobody warns beginners about. Tomatoes need EC around 2.0-3.5 to fruit properly. Herbs like basil want EC 1.0-1.6. Put both in the same pod system and you’re stuck picking one: either you starve the tomatoes or you chemically burn the basil.
It gets worse. Tomato roots are aggressive. In a shared reservoir, they grow fast and thick, blocking water and nutrient flow to neighboring pods. I’ve seen this pattern repeatedly, and it ends the same way every time: both crops underperform, and the grower blames the system.
If you want to grow tomatoes or peppers eventually, dedicate a separate unit to them. One system, one crop type. The iDOO’s 12 pods are plenty for a full herb rotation or a full lettuce rotation. Not both simultaneously, and definitely not herbs plus tomatoes. I wrote more about the nutrient competition problem here if you want the longer version.
 iDOO Hydroponics Growing System Kit 12Pods, Indoor ...
12-pod indoor garden with 22W LED and two growth modes, grows herbs and vegetables 20% faster than soil with 4.5L water tank capacity
~$79.98
iDOO Hydroponics Growing System Kit 12Pods, Indoor ...
12-pod indoor garden with 22W LED and two growth modes, grows herbs and vegetables 20% faster than soil with 4.5L water tank capacity
~$79.98
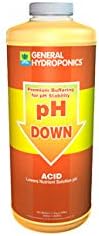 General Hydroponics pH Down Adjusting Solution - 1 Quart
1-quart buffered pH adjustment solution for hydroponic systems, lowers pH to optimal 5.5-6.5 range for crop growth
~$22.99
General Hydroponics pH Down Adjusting Solution - 1 Quart
1-quart buffered pH adjustment solution for hydroponic systems, lowers pH to optimal 5.5-6.5 range for crop growth
~$22.99
 FOLLOWIN pH Up and Down Control Kit for Hydroponics, Soil ...
9-ounce concentrated pH adjustment kit with up and down solutions, suitable for hydroponics, aquariums, and soil gardens.
~$21.95
FOLLOWIN pH Up and Down Control Kit for Hydroponics, Soil ...
9-ounce concentrated pH adjustment kit with up and down solutions, suitable for hydroponics, aquariums, and soil gardens.
~$21.95
Tip 5: Top Off With Half-Strength Nutrient Water, Not Plain Water
This one trips up almost every first-time pod grower and no beginner guide covers it.
When the reservoir level drops and you top it off with plain water, you’re diluting the nutrient concentration. EC drops. Plants get less food. So you add more nutrients to compensate. But you haven’t done a full drain, so the old nutrient salts are still in there. Salt builds up. Eventually you get root burn even though the EC reading looks reasonable because the composition of what’s in the water has drifted from what you intended.
The fix is simple: top off with half-strength nutrient water instead of plain water. When the total volume you’ve added through top-offs equals roughly one full reservoir, do a complete drain and refill. I wrote about exactly when to do that and how to tell the difference between a top-off situation and a full-change situation, because they look the same until you understand what you’re measuring.
Tip 6: pH Is Probably the Problem (Even When It Doesn’t Look Like It)
Yellow leaves in week two. Stunted growth that doesn’t respond to more nutrients. Brown edges on otherwise healthy-looking plants. These are all classic pH symptoms, and they’re almost always diagnosed as something else first.
The target range for most pod garden crops is pH 5.5 to 6.5. Outside that window, plants can’t absorb nutrients even if the nutrients are present. You can have perfect EC and still see deficiency symptoms if the pH is off.
AeroGarden’s branded nutrients include a pH buffer that keeps most tap water reasonably stable for herbs and lettuce, which is useful for beginners. But if your tap water is hard or alkaline to start (which you’ll know from Step 0), that buffer isn’t enough. My tap water comes in at pH 8.7, and even with AeroGarden nutrients, it was pulling the reservoir out of range within a week. That was frustrating, I’d done everything the instructions said, spent money on the branded nutrients, and still watched plants struggle because the buffer simply couldn’t keep up with water that alkaline. No guide mentioned that was even possible.
For most countertop pod gardens, a bottle of pH Down is the first thing to have on hand. General Hydroponics pH Down check current price is highly concentrated, so the 1-quart bottle covers a long time worth of small reservoir adjustments. A few drops, stir, test, repeat until you hit 5.5-6.5. The FOLLOWIN pH Up and Down Control Kit see on Amazon is what I currently use for both adjustments, and it’s cheaper for a starter kit that includes both directions. (Fair warning on the FOLLOWIN: some people find it needs a higher dose than comparable products. I’ve found that’s true, but it still gets the job done.)
General Hydroponics pH Down Adjusting Solution - 1 Quart
1-quart buffered pH adjustment solution for hydroponic systems, lowers pH to optimal 5.5-6.5 range for crop growth
Check Price on AmazonDo NOT cheap out on the pH meter itself. The $7 yellow pen on Amazon is not a budget version of a real pH meter. It drifts fast and gives you readings you can’t trust. Spend $15-20 minimum. Calibrate it monthly. There’s more detail on which meter is actually worth buying here .
⭐ My Pick
General Hydroponics pH Down Adjusting Solution - 1 Quart
1-quart buffered pH adjustment solution for hydroponic systems, lowers pH to optimal 5.5-6.5 range for crop growth
Check Price on AmazonTip 7: Keep the Water Temperature Below 75°F
This one gets zero attention in beginner guides, and it’s a problem for kitchen countertop units in summer.
Root rot bacteria (pythium) becomes active above 75°F water temperature. A pod garden sitting on a kitchen counter in June can easily hit 74-78°F reservoir temps, especially if the unit is near an oven, a window getting afternoon sun, or just in a warm apartment. The pump in most pod systems adds a small but real amount of heat to the water as it runs.
The signs of pythium are brown, slimy roots with a smell. Healthy roots are white and firm. Once pythium takes hold, it spreads fast in a small warm reservoir.
The easiest prevention is location: keep the unit away from heat sources. If you’re in a warm climate and running the system in summer, a small cold pack wrapped in a cloth and placed near (not in) the reservoir for part of the day can help. Hydrogen peroxide (H2O2) is the sterile approach to treatment if you do get root rot, but you cannot use it alongside beneficial bacteria products like Hydroguard. Pick one approach and stick to it.
Week 1 Daily Checklist
For the first seven days, this is what actually needs doing:
Day 1: Fill reservoir with filtered or tested tap water. Add half-strength nutrients. Test pH, adjust to 5.5-6.5. Cover all empty pod holes. Plant seeds 1/4 inch into center of sponge.
Day 2: Check reservoir level. Don’t touch the pods. Leave the system in darkness or low light for the first two days, seeds don’t need light to germinate, and darkness actually speeds things up.
Day 3: Same as Day 2. Resist the urge to lift the domes and check seeds every hour. They’re fine.
Day 4: Check pH again. It often drifts in the first few days, especially with tap water. Adjust if needed. Turn on lights if you haven’t.
Day 5: Check for sprouts. Most herbs and lettuce show a tail by day five to seven. Check reservoir level and top off with half-strength nutrient water if it’s dropped.
Day 6: If roots are visible below the pod, you’re on track. No other action needed.
Day 7: Full water test: pH, EC. Compare EC to your target range for your crop. If you’re below 0.8 (for lettuce) or 1.0 (for herbs), your nutrient mix is too dilute. If you’re above the high end, do a partial drain and top off with plain water to bring it down.
That’s the whole first week. You’re looking, not touching. Most of the real work in week one is keeping yourself from interfering with a process that needs time more than anything else.
But if you’re still figuring out which system to buy before you start, the pod cost breakdown here is worth a look. And if you’re already running a system but the nutrients situation feels confusing, this article on cheaper nutrient alternatives covers the actual math on what makes sense.
This article is part of my Hydroponic Troubleshooting Guide , a complete resource for countertop hydroponic growing.
Frequently Asked Questions
How often should I change the water in an AeroGarden or iDOO pod garden?
The manufacturer recommendation is every ten to fourteen days, but that’s a calendar-based guess, not an actual measurement. The better trigger is EC: when it drops below your crop’s target range (0.8 for lettuce, 1.0 for herbs), it’s time for a full change. Mature plants in summer can hit that threshold faster than two weeks. Seedlings might not hit it in three. An EC pen is cheaper than wasted crops.
Do I need a pH meter for a countertop hydroponic garden?
For AeroGarden with branded nutrients and soft tap water, you can often get through herb grows without one. For everything else, yes. If your tap water is hard or alkaline, AeroGarden’s pH buffer isn’t enough to keep the reservoir stable long-term. A $15-20 meter catches problems before plants show symptoms. The $7 yellow meters aren’t worth using. See the full breakdown on pH meters here .
Can I grow tomatoes and herbs in the same pod garden at the same time?
No. Tomatoes need EC 2.0-3.5 to fruit. Herbs max out around 1.6. You can’t hit both targets in one shared reservoir, so one group always loses. Tomato roots also grow aggressively and block nutrient flow to neighboring pods. If you want to grow both, you need two separate units.
Why are my hydroponic plants turning yellow in the first two weeks?
Almost always pH. Either the reservoir pH is outside 5.5-6.5 and nutrients are locked out, or nutrients were added at full strength before seedlings were ready. Wait until roots are visible before adding nutrients, start at half dose when you do, and test pH first before blaming the nutrient formula.
How do I stop algae from growing in my pod garden?
Cover the empty pod holes before your first fill. Foil, the included stickers, golf balls, whatever. Algae needs light to grow in the reservoir, and uncovered pod holes deliver it directly. Once algae establishes, even blocking the light source won’t stop it from spreading fast. This is a day-one prevention task, not something to fix later. More on stopping algae here .
What’s the easiest crop for a first pod garden grow?
Lettuce or basil. Both germinate reliably, tolerate minor mistakes in pH and nutrients, and give you fast visual feedback. Lettuce is slightly more forgiving because it doesn’t bolt as quickly and responds well to cut-and-come-again harvesting. Don’t start with cilantro (germination issues), spinach (temperature and light sensitivity), or anything fruiting. Get one clean lettuce grow under your belt first.
Before your next fill, run the tap water test if you haven’t. Everything else in this guide depends on knowing what’s actually in your water.